AI Assistant for WordPress
Enhance your WordPress site with KayeAI's AI Assistant widget in just a few easy steps.
Step 1
Download the Plugin
Step 2
Install & Activate
Step 3
Configure the Plugin
Step 4
Confirm Integration
Download the Plugin
Download the AI Assistant plugin from the following link:
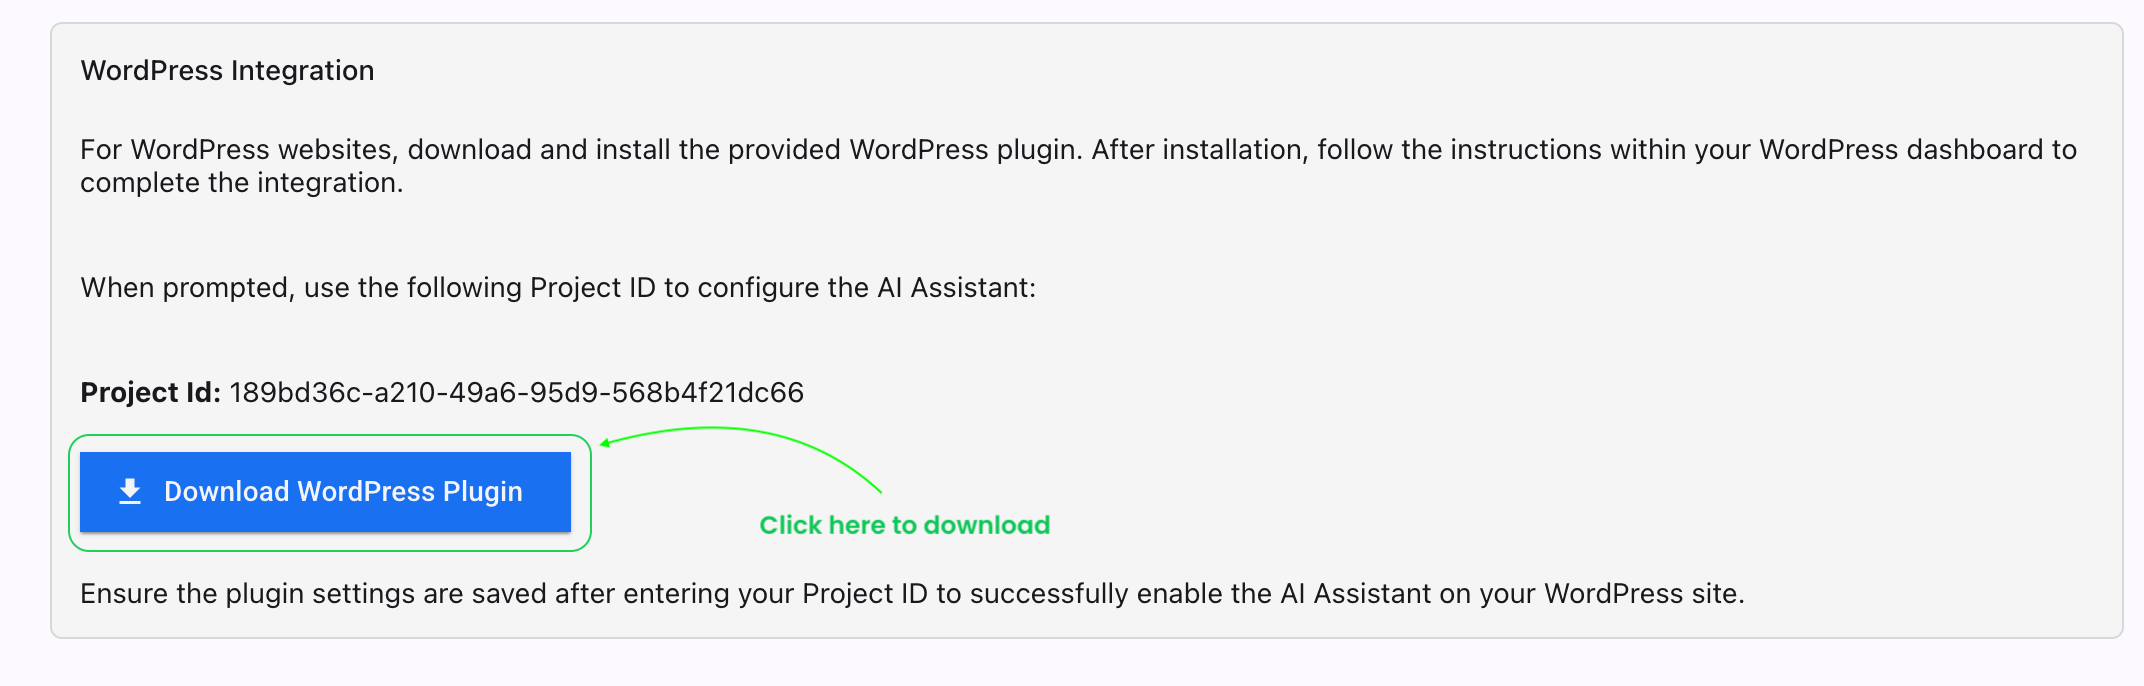
Note: The plugin file is named apollo-widget-wp-plugin.zip. Keep this file handy for the next step.
Add AI Assistant to Your Website
Integrate the KayeAI Assistant widget directly into your website's HTML code
Direct Code Integration
To add the KayeAI Assistant widget to any website, insert the following code snippet just before the closing </body> tag in your website's HTML file:
Installation Steps:
- Open your website's main HTML file (often
index.html) or your template file in your code editor - Locate the closing
</body>tag near the end of the file - Paste the code snippet above directly before the closing body tag
- Save the file and upload it to your web server if necessary
- Visit your website to confirm the AI Assistant widget appears in the bottom-right corner
Example Implementation:
 <chat-widget env="prod" project-id="442b759d-259e-4259-9389-771bbdecdf4d" />

      <Script crossOrigin="anonymous" src="/chat-widget.js" type="module" strategy="lazyOnload"/>
Framework-Specific Installation:
React Applications
For React applications, add the script to your main HTML file (usually public/index.html) before the closing body tag.
Next.js Applications
For Next.js, add the script to your _document.js file inside the <body> component.
Vue Applications
For Vue applications, add the script to your index.html file before the closing body tag.
The widget is designed to be lightweight and won't affect your website's performance. It loads asynchronously so it won't block your page's rendering.
Need Help?
If you encounter any issues or require further assistance, contact our support team: